Healing Your Troops
Sooner or later your troops are going to get hit hard, and you’ll be left with a bunch of wounded troops. This could be during a bunker fight, during capital clash, or simply a war with another alliance. You’ll want to heal your troops as fast as possible so 1) they can get back to the fight and 2) you fill your hospital to capacity and start losing troops (a percentage of lost troops can be recovered via the enlistment office). Though you might be tempted to select all of your wounded troops and heal them at once, there’s a better, and faster, way–Batch Healing.
Batch Healing
In short, Batch Healing (also called Micro Healing) is a trick where you heal your troops a fraction at a time–in batches. By doing this, you’ll be able to take advantage of healing timer helps from your alliance and “insta-heal” each batch. The number of troops you should have in each batch will vary based on your settlement specifics (types of wounder troops, chief skills, hospital level, assembly level, etc.), but a general rule of thumb you should use is to select 1 hour of troop heals per batch. If you are a higher level HQ and know that there are a lot of your alliance members currently online to help heal, you might be able to “insta-heal” 2 to 3 hours of troops at a time.
To determine what your maximum heal time is for each batch to “insta-heal,” take a look at your Timer Help Duration and Timer Helps under your Assembly Point building.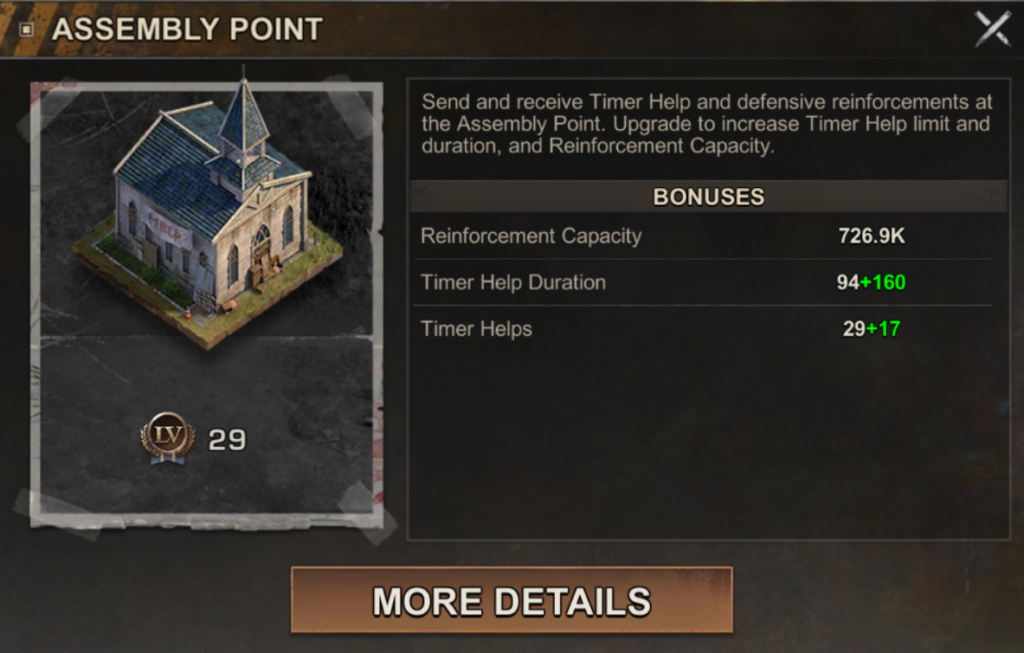
For this level 29 Assembly point, Timer Help Duration is 94 + 160 = 254 seconds (or 4 min, 14 sec), and this chief can receive 29 + 17 = 46 Timer Helps from alliance members. Since each Timer Help is 4:14 reduced healing time, if they get all 46 Timer Helps, healing time will be reduced by 3 hours, 14 min, 44 sec. So, as long as each healing batch is under 3:14:44 in healing time, and enough alliance players are online to give the max 46 Timer Helps, the healing batches will be “insta-healed.” You’ll need to find your sweet spot for batch healing time, though, since having 46 players online constantly hitting the help button is difficult to do even for the most active alliances. Try experimenting with different batch times starting around 1 hour until you find your own perfect sweet spot.
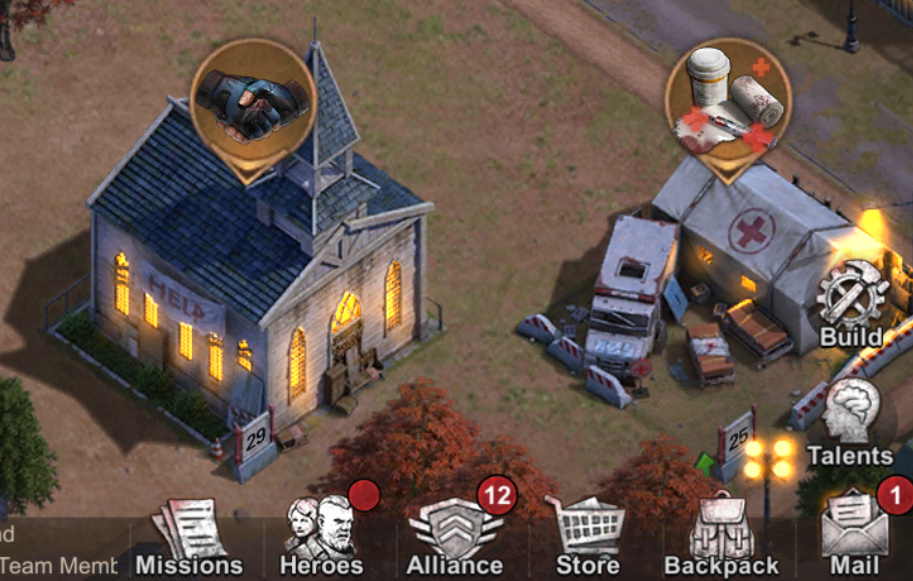
Optimal Building Layout
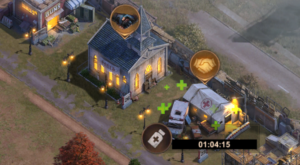
To make healing even faster for your alliance, position your assembly point right next to your hospital in your settlement. This will allow you to continuously tap on Help Timers to help your alliance mates heal while adding new healing batches to your hospital without having to scroll around your settlement to locate the buildings. In the heat of the battle where every second count, this could be the deciding factor between victory and defeat.
Advanced Healing Strategy
If you really want to optimize your healing, you can cut down on your constant tapping to select batches of troops and helping alliance members. The easiest way to do this is by using a “Repeated Taps” function. This will take some set up, though, so plan to get everything ready in advance.
Step 1 – Download BlueStacks. You’ll need to download BlueStacks on PC so you can access SoS from your PC. Click here to download and install BlueStack. Once you have it installed, log in to your Google Android account and download SoS from the Play Store. Once you have State of Survival downloaded, you can open your account through BlueStacks and play the game as you normally would via mobile device.
Step 2 – Position your buildings. You’ll need to place your assembly point and hospital side-by-side. Additionally, you’ll need to have your screen in the same location every time you use this technique. The best way to do this is to place the hospital on the right with one corner directly above the backpack strap, put the assembly point to the left of the hospital with the corners aligned, and zooming in on the map as far as the game will let you (use the up arrow on your keyboard to zoom in).
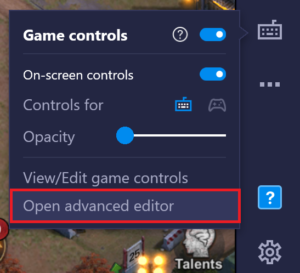
Step 3 – Open control editor. After positioning your buildings, open the game controls by clicking on the keyboard icon on the BlueStacks menu, then selecting Open advanced editor.
![]()
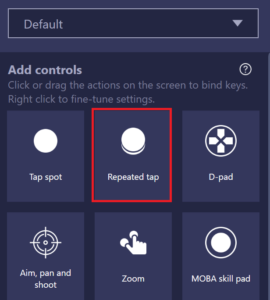
Step 4 – Set up repeated tap. In the control editor, click and drag the Repeated tap control onto your game screen. You’ll want to drag this directly over the Help icon above the Assembly Point.
Once the repeated tap control is over the help timer icon, enter a shortcut key that you’ll easily remember for this control. H for “help” is easy to remember. Ensure that the control is set to Tap and not Long press. Finally, set how many taps you want this control to trigger when you use this. For example, setting this option to 30 will trigger 30 taps whenever H is pressed (and the screen is positioned correctly).
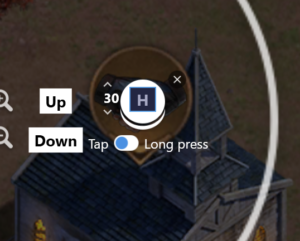
Click Save and close out of the editor.
Step 5 – Record Macro. This is the most involved part of the set up. If you’d rather download the pre-existing macro, skip this step and go to Step 5 Alternate below.
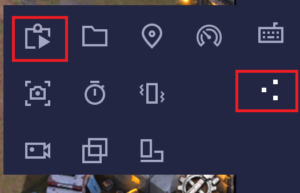
Open up the macro recorder by clicking on the three dots on the menu and selecting the icon that looks like a laptop screen with a play button.
One you’re in the macro recorder, click on Record new macro. Before you do this, ensure that your building and screen positions are aligned appropriately as instructed in Step 2.

Now you’ll go through all the steps you want to automate. Click on the hospital to open the wounded troops screen.
Press on Quick Select to set all troops to 0.
Then click on the top most troop count to manually enter the number of troops you want to batch heal. Enter in you batch number. In this case, we’re using 1000 troops. Don’t worry if you don’t have enough troops in the hospital right now. We’re setting up the automation so it will default to 1000 at a time when you do have more wounded troops.
Click ok.

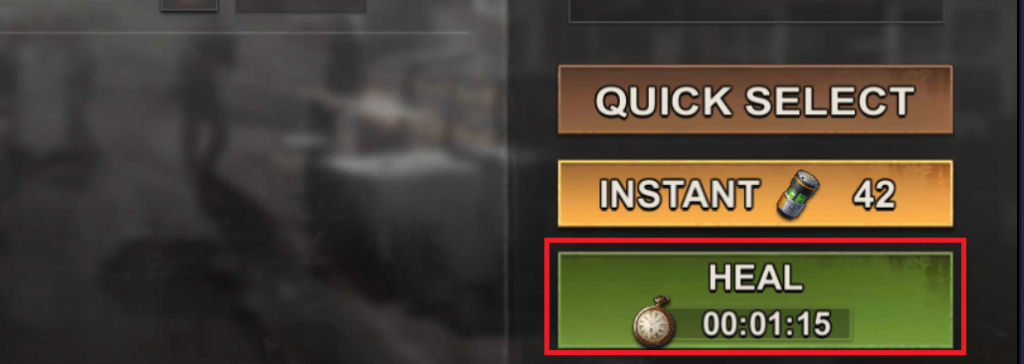
Click on heal to start your batch heal.
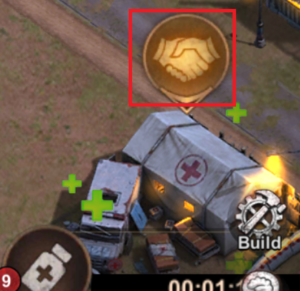
Next, click on the help icon above the hospital. It’s important you don’t move the map at this point since screen position is key to the macro functioning properly.
Remember the shortcut key you set up earlier for timer help? Type that now. In this case, press H. You should see the help icon above the Assembly Point disappear.
Now you can stop the macro recording by clicking on the stop icon on BlueStacks.
![]()
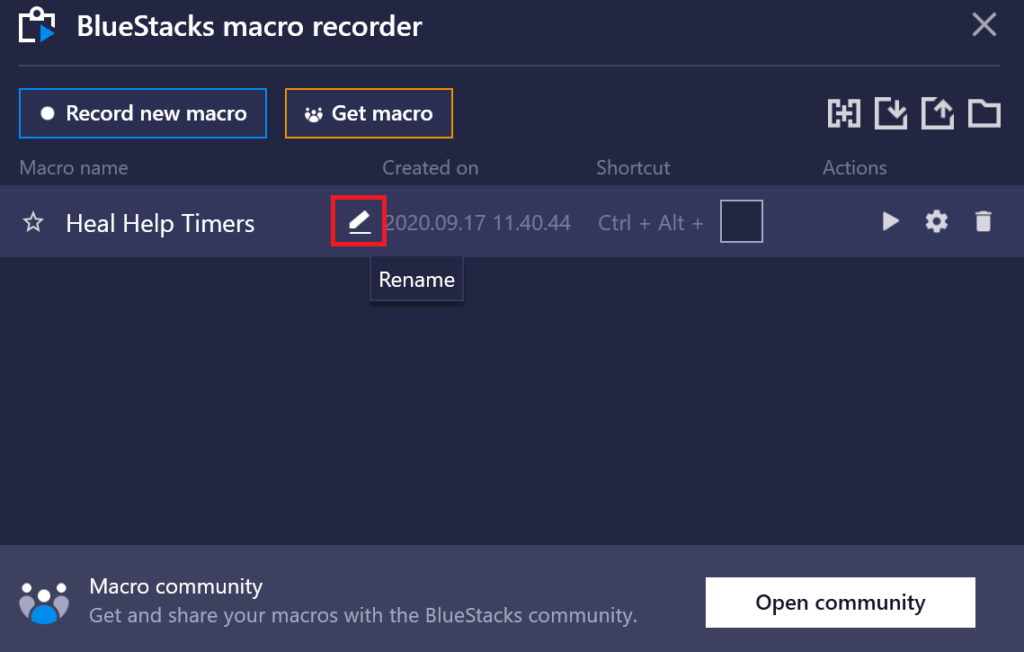
If you’d like, rename the macro to something that identifies it.
Finally, set up a shortcut key that you can use to trigger the macro. You can also manually click on the play icon to start the macro.
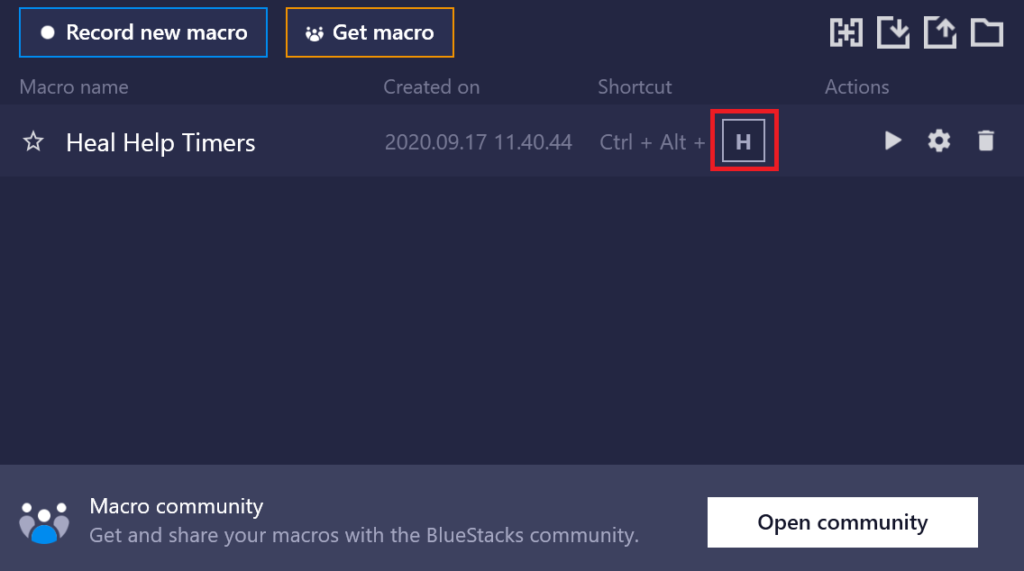
And that’s it! Now you’re ready to go. Everytime you want to use the macro, position your hospital above you backpack, zoom all the way in, and press the Ctrl + Alt + H shortcut key. No more aching fingers from constantly tapping on the help icon.
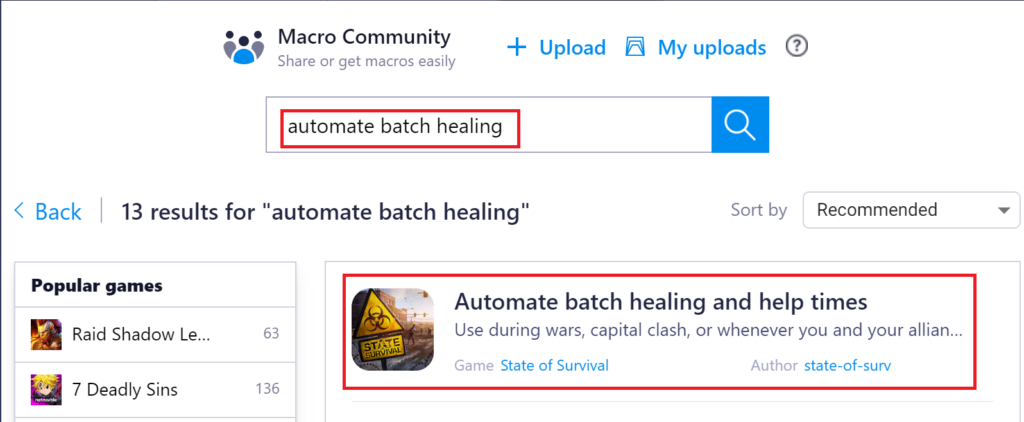
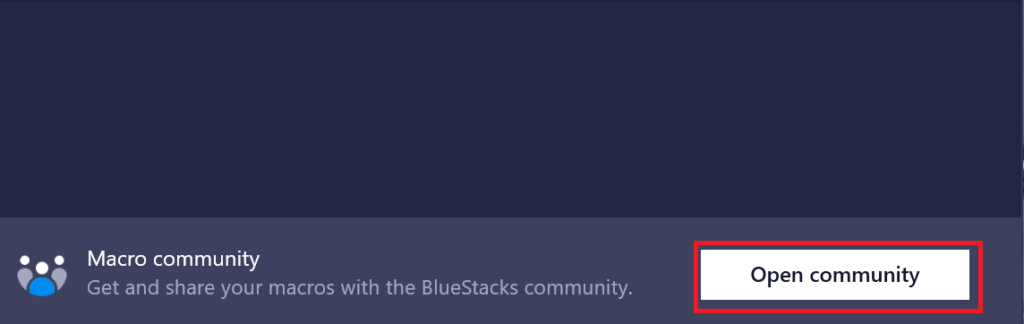
Step 5 Alternate – Download macro. If you don’t want to go through the hassle of recording you own macro, you can download the pre-existing macro from the BlueStacks Macro Community. You’ll need to ensure that you’ve followed steps 1-4 above to position your buildings and screen as well as set up your repeated taps control. After you’ve set this up, open the macro screen and click on Open community.
Search for automate batch healing and download the macro by the author “state-of-surv.” Check the description of the macro to ensure it comes from www.state-of-survival.net. Then install the macro and get to healing!